I have spent a few days hacking around with Daniel Seagraves’ spiffy LambdaDelta LMI-Lambda Lisp Machine emulator. Oddly I’ve never seen anything out on the interwebs that demonstrates what a LMI Lambda looks like or how to use it.
Note that because LambdaDelta needs telnet to talk to the SDU (System Diagnostic Unit) and telnet is an insecure application, it’s best to perform this work in a virtual machine that’s connected through a NAT to any networks.
Setup
After a very few little niggles I got LambdaDelta compiled, mostly failings of my own understanding of the documentation. One little nit that I discovered is that there appears to be no way to configure the emulator so no telnet to the SDU monitor is needed; next hack I’m sure. The recipe I used for prerequisites and configure were:
sudo apt install libsdl-dev
./configure —-disable-use_xbeep —-without-SDL2
One can use SDL2 as well (—-without-SDL1) depending; according to the github one or the other may perform better depending on whether one’s using X11 over the network or local. I’ve used both on local with pretty identical performance.
If you’re running most recent Ubuntu Linux distributions or a Linux that uses Gnome3 as its desktop/window manager, you may need to unmap the ‘Activities Overview’ hotkey (usually Super, or ‘Windows Key’) to allow LambdaDelta to sense it. To do so, use something like:
gsettings set org.gnome.mutter overlay-key “”
A subset of the modifier key mappings are (more on the github page):
| Meta | Alt |
| Super | Windows Key |
| Hyper | Menu Key |
You’ll also need telnet installed in order to communicate with the SDU (System Diagnostic Unit).
Bootstrapping
The best set of tapes to use for LambdaDelta would be Daniel’s latest version (1.0 as of 9/2/2020), but the older “5.0” version can be found here for reference purposes. Untar the tape tarball into the root of your working directory for the running emulator, which should create the directory “tapes”, with files 01_install.tap, 02_system.tap, and 03_options.tap for the installation, system sources/demos, and optional package load tape images.
We also need to attend to the disk configurations found in lam.yml: the disk files are found under the directory “disks”. The only thing that one needs to do is make sure the disk files indicated in lam.yml exist; they don’t need to be preallocated with disk blocks as the emulator will automagically add the right number of blocks as the disks are accessed.
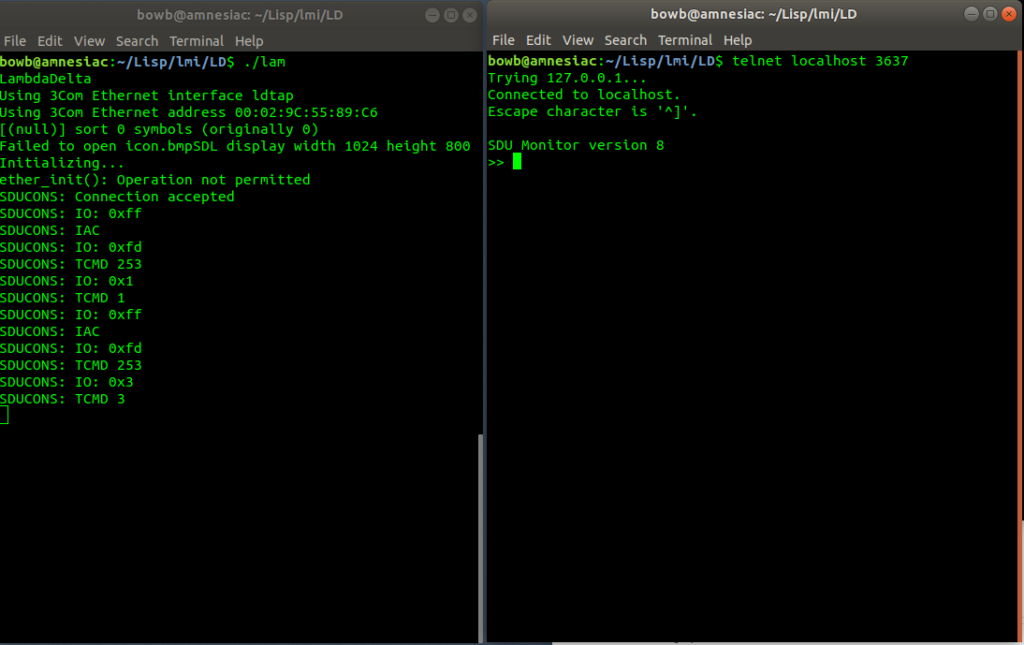
We will need two terminal windows set up, one for the emulator, and the other for a telnet instance that will communicate with the SDU. Start up the emulator (left) with “./lam”, and then “telnet localhost 3637″ in the right window. This will get he emulator running, and ready to install the distribution software.
Daniel’s software installation instructions are pretty good. The one caveat I would add is that in the README.Release5 file refers to ‘Restore’ should refer to the ‘Retrieve’ mode button, and the ‘Restore-Files’ command.
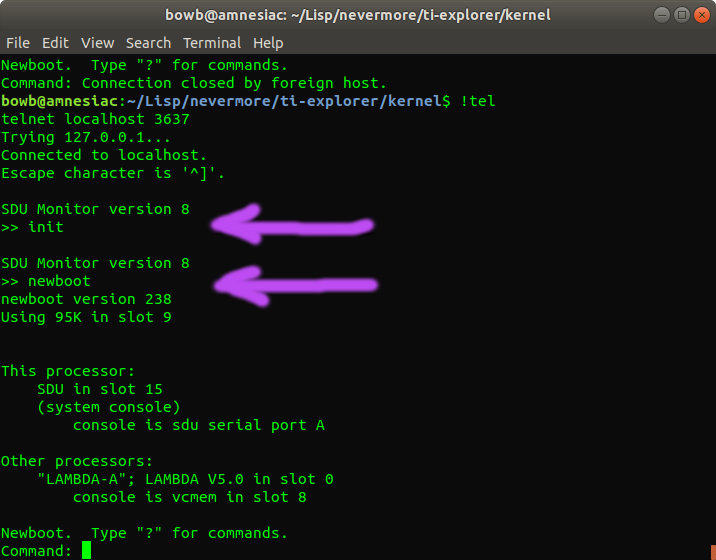
Shortly the graphical console will start up, and then we can boot Lisp! In the SDU window, use ‘init’ (initialize the multibus cards), and ‘newboot’:
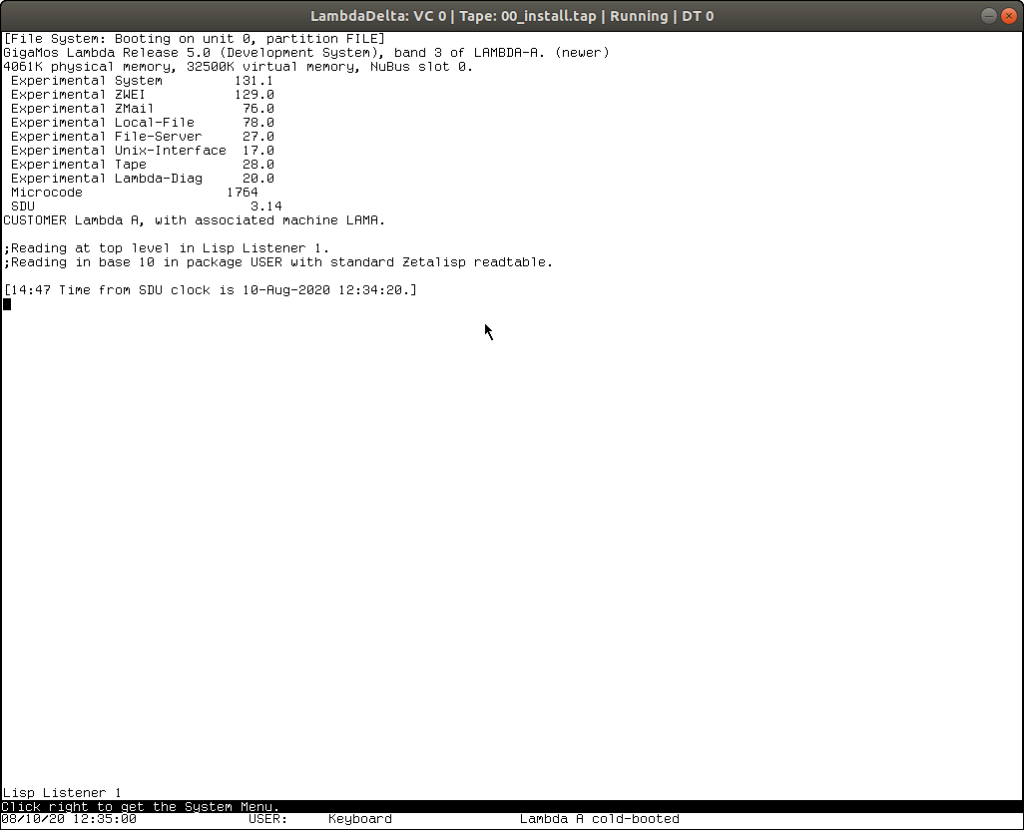
After a bit of churning we are greeted in the Graphical Console with:
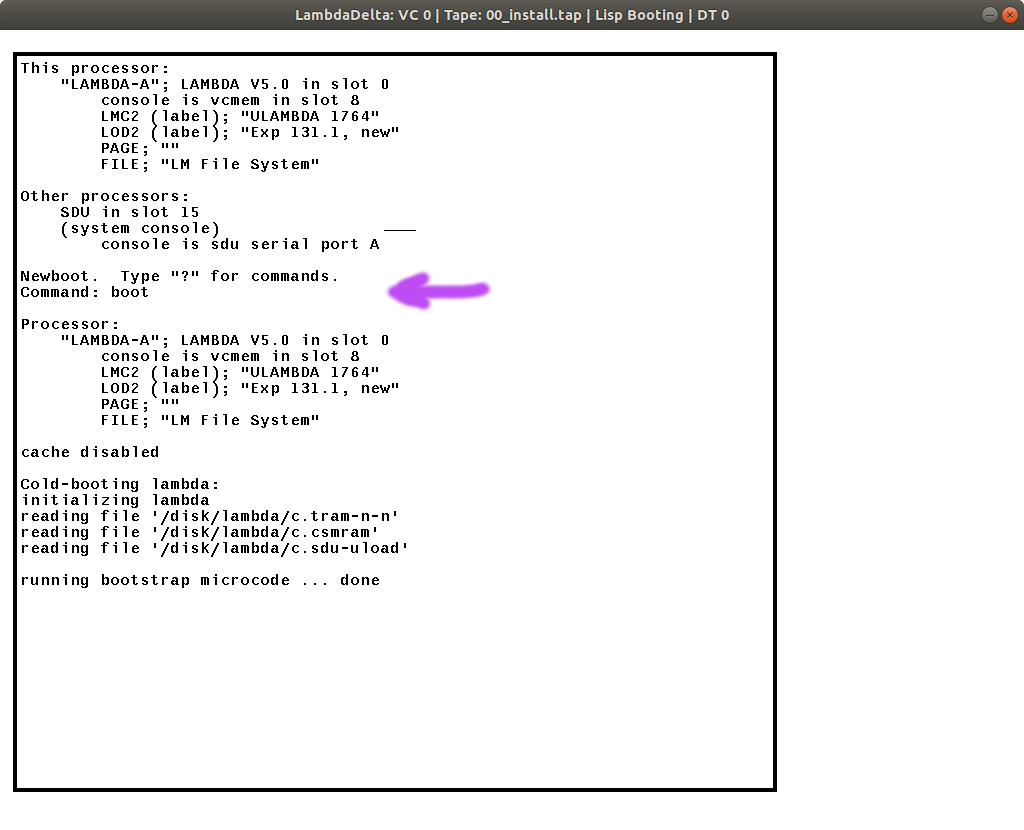
Use boot as indicated to start the bootstrapping of Lisp.
Multiple Windows
The System Menu works in LambdaDelta, (rightclick), and lets us create multiple asynchronous windows on the display:
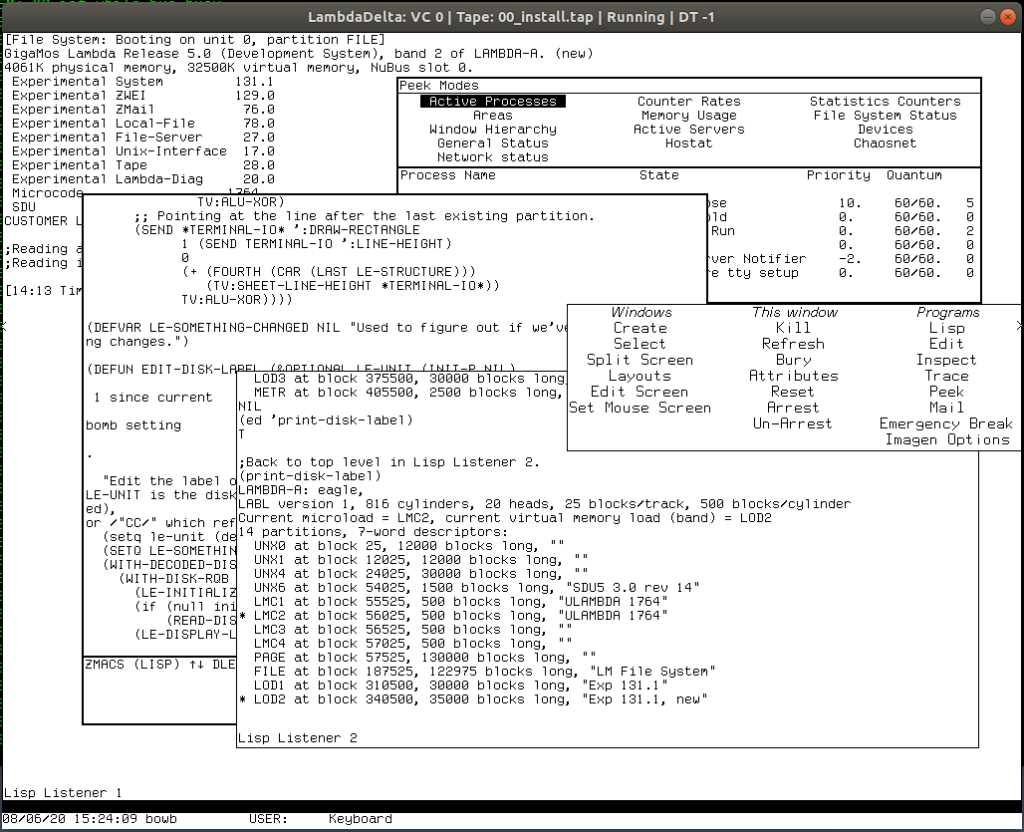
The upper-right window shows the ‘Peek Mode, which is a viewer for all active processes on the system. Lower left in back has an instance of Zmacs editor, examining part of the (print-disk-label) defun, and the foreground has the output of (print-disk-label). Tucked below the Peek window is the System Menu, which not only allows manipulation of existing windows, but the Programs section causes a raising of a window of the listed type or creating a new one if a particular program doesn’t exist.
Directory Editor
So let’s dig around in the filesystem and see what’s there. Here I’ve already loaded LambdaDelta’s Lambda-Release5 plus some other stuff on bitsavers, which includes much (some?) of the system source:
| (login ‘bowb) | Identify ourselves to the Lambda |
| F1-e | System-Edit |
| Meta-X | Zmacs extended command |
| dired | Invoke directory editor |
| LAMA: Release-5; *.*#* | Examine sub-directory under Release-5 |
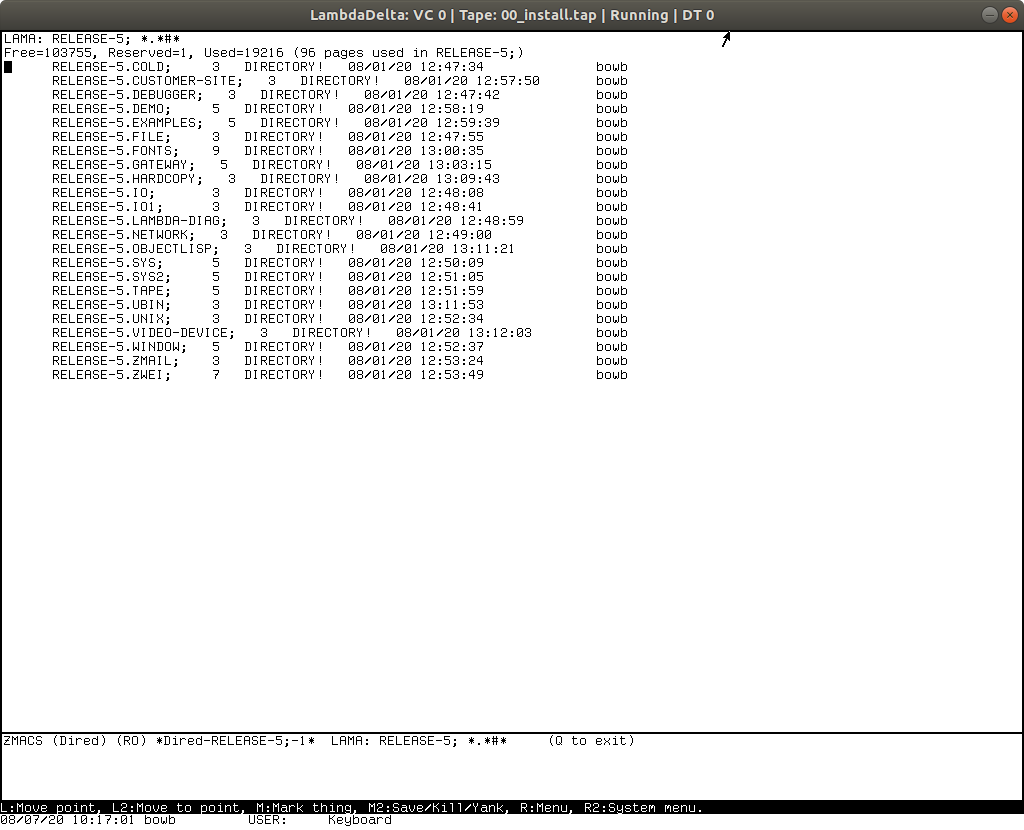
Using the blinking cursor block as a selection pointer, there’s quite a few things we can do in dired:
- ‘E’ – invoke dired on selected directory, or edit selected file (use Control-Meta-L to return to dired).
- ‘<‘ – go up one level
- ‘L’ – load LISP code as with the load function.
Dired is pretty powerful, if idiosyncratic compared to what most folks are used to today. The best thing to do at this point is to dredge the PDF documentation on bitsavers to see what else one can do.
Have fun hacking on LambdaDelta! It’s a pretty feature-complete emulator for a Lisp Machine emulator.